


Materials Science meets Photography

Aalto Materials Platform has arranged Photography for Scientists photography course for few times and before that it was done by Aalto School of Science.
Idea for this course came by professor Robin Ras who thought that scientists need skills to be able to take pictures of their projects, samples etc. I totally agree. Now after four courses I finally saw concrete examples of this. And now I'm not talking about only photo exhibition. But let's get back to that later.
Photography for Scientists –valokuvauskurssi huipentui näyttelyn avajaisiin
One great aspect of Photography for Scientists photography course is that we finish it to exhibition. I found it exciting that scientists create art in Aalto University.
Another aspect is that when participants see their images final prints in large scale, it's like magic. To see something concrete, not just pisture in small scale in camera's backscreen or laptop. I think it also helps to undestand workflow of photography from planning to final result.
Special for this exhibition is also that we designed it by ourselves. We spent last session in exhibition location with small prints and thought about image order and places.
After that Valeria Azovskaya ja Glen Forde mage great job finishing exhibition with all pictures, labels and lights. I think our photography exhibition appears professional.
Thank you for all participants for your effort for this course. And of course thank you for Heidi Henrickson for making this all happen. I was really happy to participate this once again :)

Light as tool in Shanghai
Thank you China & Shanghai – 感谢大家
I had great opportunity last August to travel China and do couple of Dedolight lighting seminars there.
Check what happened in Shanghai!
Light as tool – Soft light
Lighting equipment
(1) Main light: Dedolight Panaura 5 + grid
(2) Fill light: Dedolight DLEDRAMA
(3) Background light: Dedolight DLED 7 + barn doors
(4) Rim light: Aladdin BI-FLEX 1 (30x30cm) attached to Aladdin BI-FLEX 2 (30x56cm)
(5) Hair light: Aladdin BI-FLEX 2 (30x56cm)

Light as tool – Hard light

Lighting equipment
(1) Main light: Dedolight DLED 7 + barn doors
(2) Fill light: Dedolight DLEDRAMA
(3) Rim light: Aladdin BI-FLEX 4 (30x108cm)
(4) Rim light: Aladdin BI-FLEX 1 (30x30cm) attached to Aladdin BI-FLEX 2 (30x56cm)
(5) Additional light source: Dedolight DLED 7 + barn doors (to lit front of model)
(6) Additional light source: Dedolight DLED 7 + barn doors (to lit decorations on model’s hair)
(3) Background light: Dedolight DLED 7 + projection attachment + gobo

To be continued, next: Lighting seminar in Beijing!
Light as tool in Beijing
Thank you China & Beijing – 感谢大家
I had great opportunity last August to travel China and do couple of Dedolight lighting seminars there.
Check what happened in Beijing!
Light as tool – Soft light

Lighting equipment
(1) Main light: DLED 9 + barn doors + white, translucent diffuser
(2) Fill light: Dedolight DLEDRAMA
(3) Rim light: Aladdin BI-FLEX 1 (30x30cm) attached to Aladdin BI-FLEX 2 (30x56cm)
(4) Rim light: Aladdin BI-FLEX 2 (30x56cm)
(5) Fill light/reflector: white card board
(6) Background light: Dedolight DLED 7 + projection attachment + gobo

Light as tool – Hard light
Lighting equipment
(1) Main light: Dedolight DLED 7 + barn doors
(2) Fill light: Dedolight DLEDRAMA
(3) Rim light: Dedolight DLED 7 + barn doors
(4) Additional light source: Dedolight DLED 7 + barn doors (to lit front of model)
(5) Additional light source: Dedolight DLED 7 + barn doors (to lit front of model)
(6) Background light: Dedolight DLED 7+ barn doors


See your light – continuous light sources in portraiture

Last Saturday I had photography workshop in cooperation with Audico Systems. Theme of the workshop was how to use continuous light sources in portraiture.
I find as main advantage of continuous light sources that you can see light all the time you're shooting. So what you see through viewfinder will be same in final image.
To be able to see light all the time you're shooting makes it easier if you compare it to use of flash. But it's not that simple.
Whether you use flash or continuous light sources you still need to understand about light and lighting. I think you need to understand f.e. how to place and point light sources in relation to subject, how to to decide brightness of light sources (f.e. main light, kicker...), how to control contrast – all these basics of lighting which every photographer has to take care apart from which light sources he/she uses.
And of course you need to understand about rhythm of light and shadow. My favorite subject :D
Among technical points of view I wanted to demonstrate to participants also about visual and storytelling points when you're shooting people:
- differences in methodology: how to shoot people in stable lighting condition (studio) or in location with natural or available light --> in studio photographer builds all lighting and he/she can control it too
- genre of portrait: commercial, fine art, documentary, personal portrait..
- visualization: person and props which is linked to person or only person, light and shadow
- how to guide models in shooting situation
- how to place model: poses, expressions that support message of image
Large light sources & soft light, small light sources & hard light
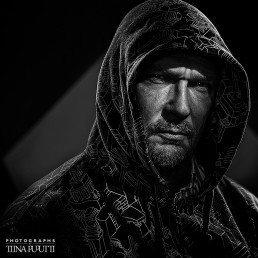
In first shooting demonstration I created classic and timeless lighting with soft light. I think everyone who does portraiture should handle this basic lighting.
And it's easy to start practice; just find nearest window – you'll get this classic lighting in front of every window. You just have to see it :)
I find it important because it's basic for all people photography. It's about "seeing light" and create rhythm of light and shadow to image; one rule of thumb which you can later on use wherever you shoot people, whether it's studio or location.
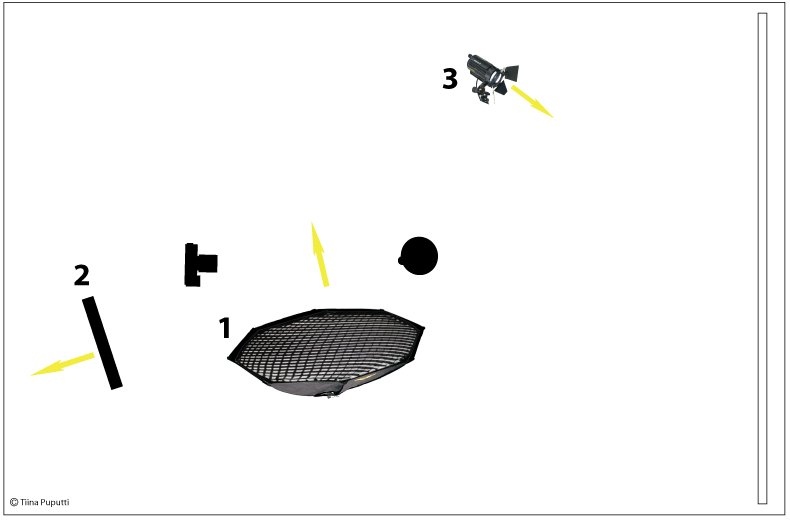
As main light (1) I used Dedolight Panaura 5 which is a large soft box.
It produces soft light and even though it's diameter is over 1m it creates 3-dimensionality to model's face. In this case there were three layers of translucent diffuser between light source and model. And grid which direct light beam.
As fill light (2) I used Dedolight DLEDRAMA-BI.
It was pointing towards walls and ceiling behind camera (about 45 degree angle). This way it circulates via walls and ceiling, and light becomes softer. At the same time it's "general lighting" which make studio a bit lighter.
As background light (3) I used small Dedolight Tungsten 100 Series -light source.
It has spot and flood position (light beam) and with that feature you can create round gradation in background.

Time for Christmas Present

I didn't send any Christmas cards or bought any presents this year – instead of that I wanted to give time.
Yesterday I worked for the very first time as volunteer in local rest home. I read couple of hours Christmas stories to elderly . I will continue working as volunteer after Christmas, so new stories and activities will follow.
Time – let's give time to each other this Christmas. Time with Your Special Ones is the most precious time of all.
Merry Christmas to You and Your Family. Cheerful New Year. Let's spend our time well in 2017 :)
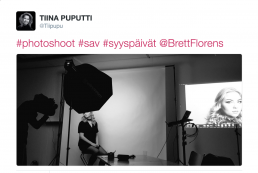
Mood boards, target groups, own inspiration – photographer Brett Florens at FPPA's Annual Meeting
I participated yesterday FPPA's Annual Meeting in Helsinki. Finnish Professional Photographers' Association and Color-Kolmio had invited Photographer Brett Florens to do seminar about his way to work as professional photographer.
Day was interesting and inspiring. I tweeted about Brett's seminar yesterday, and if you weren't there, or you want check Brett's ideas and his way to work, feel free to read my tweets. They're in reverse order -if you want to read them in chronological order, please, begin from last one :)

3 lights, 3 images – 3 different visualizations for portraits

Last week I did 45 min lighting and shooting demonstration in Road Show organized by Color-Kolmio and Foka. I wanted to demonstrate how to create 3 different portrait lighting set-ups when one has 3 studio strobes and few light modifiers, and one wonders what kind of light modifiers might be useful for portraits.
That's why I used strip -soft boxes, honeycomb grids and barn doors in these lighting set-ups, and black fabric all the time :)
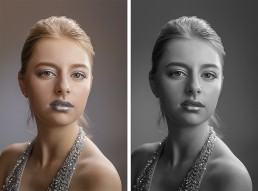
White background, controlled light – Model can move freely
Idea of first lighting set-up was that model can move freely and change pose without lighting changing that much, kind of fashion lighting set-up.
I lit background (white wall) with two studio strobes which both had umbrella reflectors as light modifier. With these modifiers light beams spread wide enough to lit wall evenly.
I placed main light behind camera and attached strip -soft box to it in vertical position. In this position light beam doesn't spread that wide and models' outlines appear darker and form of person looks more three-dimensional in image. Model wore dress made of glossy fabric on purpose, so main light made reflection on it.
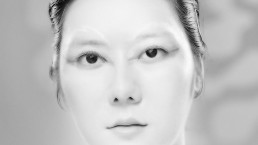
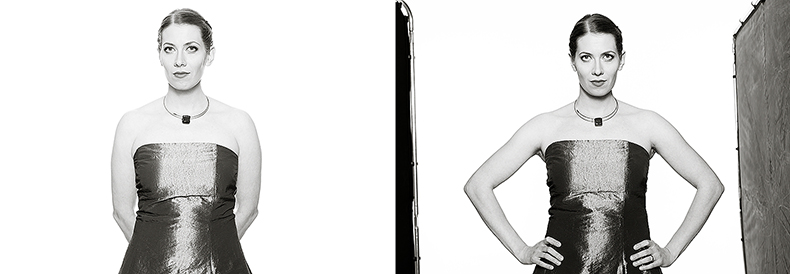
Two images below demonstrate clearly what means controlling the light. White wall reflects most of the light which hits on it. Even though model stands as fas as possible from white wall some reflected light may hit accidentally on model, and to lens.
Uncontrolled background light can be seen on first image on model's cheeks. It hits to lens too, and creates flare. Flare destroys all dark tones and image appears all gray.
Second image shows what happens when you place two frames with black fabric both sides of model to prevent flare. Light doesn't spread uncontrolled around studio anymore, and black fabric helps models' outlines to appear darker and that creates illusion of three-dimensional form of person.
Quite big difference, don't you think. I never begin shoot in studio or in location without enough black material, clamps, frames and stands that I able to create black scrim in the place where it's needed.
Lighting diagram:
(1) Main light: Elinchrome D-Lite RX 4 + light modifier Phottix stripe 35 x 140 cm (vertical position)
(2) Background light: Elinchrome D-Lite RX 4 + umbrella reflector (16 cm, 90°)
(3) Background light Elinchrome D-Lite RX 4 + umbrella reflector (16 cm, 90°)
(4) Scrim to prevent flare: Lastolite Skylite 1 x 2 m + black fabric
(5) Scrim to prevent flare: Lastolite Skylite 2 x 2 m + black fabric
(6) Background: white wall

What did I experience in Photokina?

This year it was interesting to visit Photokina, because I've asked lately so many times: where photography is heading, what's in the future? Maybe some answers could be found in Cologne.
Photo Exhibitions
First of all I visited Leica Gallery. I found photo exhibitions this year very different and interesting: lots of different styles, genres and themes.
Mostly I was impressed by pictures of Alex Webb, Fred Mortagne and Roger Ballen. All of them were very different: Webb's images were colorful, shot with wide angles on the streets; Mortagne's images were black and white and graphic and Ballen's images were combination of photos and other visual elements.
About Light Sources & Light Modifiers
On a second day I wandered around "light hall", and I found some trends in general:
- LED -panels, especially flexible panels made of soft materials
- wi-fi systems
- portable, battery flash systems
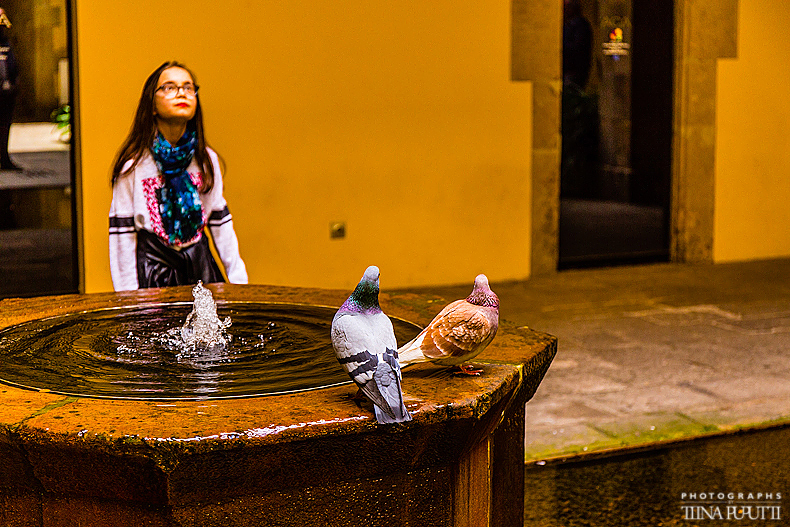
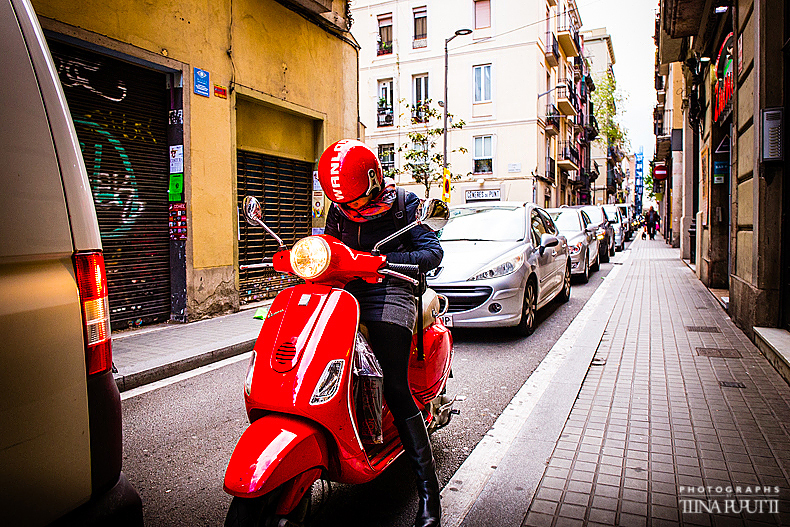
On the streets of Catalonia
I was recently on holiday in Barcelona. Between touristic tours with my Dad I had some time to shoot too :) So, some images from streets of Catalonia – colors of Catalonia, sun and spring <3 Loved atmosphere in Barcelona, at all friendly people too :)


Photography workshop for bloggers in Turku
Last weekend local camera store JAS Kamerakauppa organized photography workshop for Lifestyle Bloggers in cooperation with Canon: "How to shoot more visual and photographic images for blogs". At the beginning of the day JAS Kamerakauppa's owner Juha Saviluoto introduced place for participants.
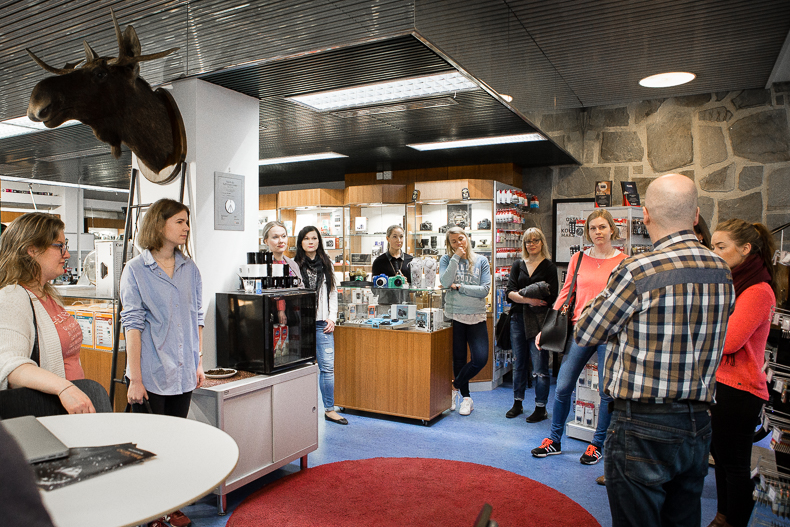
JAS Kamerakauppa has one speciality which doesn't exist anywhere else in Finland: they have Vintage store and museum. Naturally Juha introduced them with pride.


There's "bad spot" in vintage store: section of recycled photography books :) JAS Kamerakauppa has done this section even worse... have coffee machine there and cozy chairs – so you can just sit down, have coffee and check all the books... this time I arrived in Turku previous day, but I didn't go to JAS Kamerakauppa – official explanation: everything was ready for the workshop, unofficial: no new books this time... – last time I just bought too many books... :)
In vintage store there are books you don't find anywhere from Finland – no bookstores, neither libraries. Of course some of them are old, but there are so many things in photography which doesn't get old - f.e. light is same today and twenty years ago. if you don't have possibility to visit Turku and vintage store, you can also check books from JAS Online Store.
